|
The Market Structure Breakout & Heatmap System shows you exact entry and exit points — right on your chart. Ready in under 2 minutes.
See it in action
Watch real screen recordings of the indicator being used live — signals, breakout zones, and structure labels updating in real time.
Screen recording · Live signal detection
Screen recording · Real-time chart analysis
The Root Cause
It's not you. It's how you're trading.
01
You don't know where to buy or sell
You're entering trades without a clear reason — so every position feels like a guess.
02
Every indicator contradicts the last
One says buy, another says sell, a third says wait. You end up more confused.
03
No plan — just reacting
Every trade is a decision made on the fly. No framework. No checklist.
8+ hrs
staring at charts
0
setups taken
04
You're stuck watching charts all day
Glued to your screen 24/7 because you might miss the move. Exhausting.
The Solution
One system. Complete clarity.
01
See the structure
The indicator maps HH, HL, LH, LL automatically. You always know where the market is heading.
02
One clear answer
No conflicting signals. The Heatmap confirms momentum so you always know which direction.
03
Repeatable process
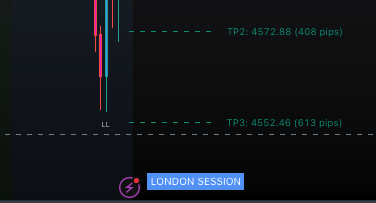
TP1, TP2, TP3 and Stop Loss are plotted automatically with exact pip counts.
Everything you need. Nothing you don't.
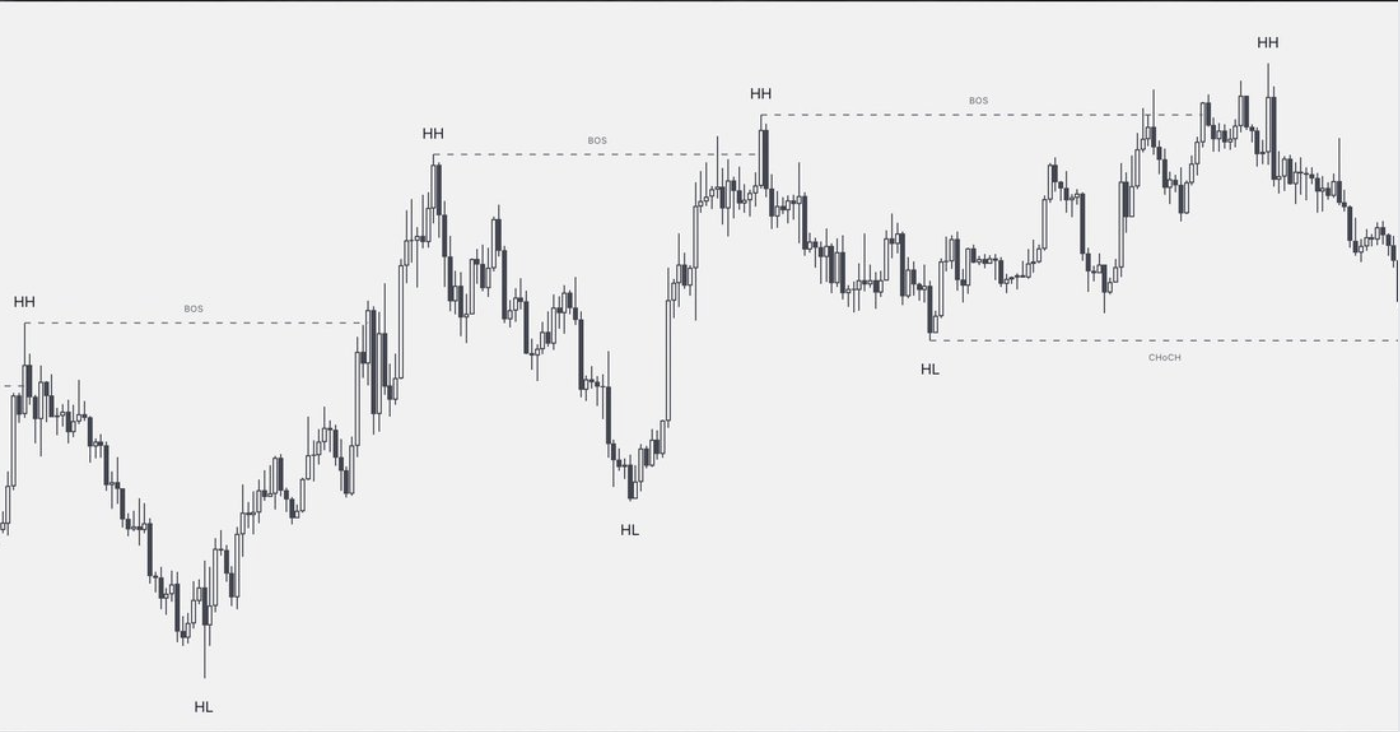
Market Structure
HH/HL/LH/LL pattern recognition marks every pivot point so you can see trend shifts before they happen.
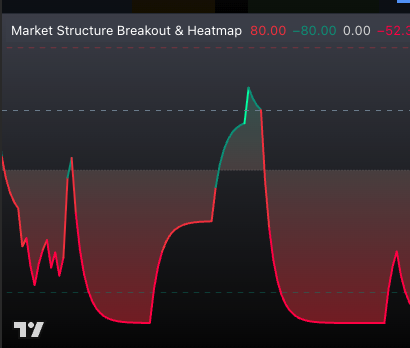
Momentum Heatmap
No buying in overbought zones. No selling in oversold zones. Only trend-aligned signals.
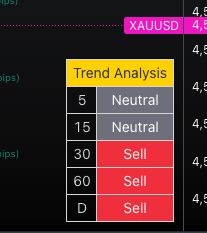
Multi-Timeframe Dashboard
Monitor 5 timeframes simultaneously. When they align — massive statistical advantage.
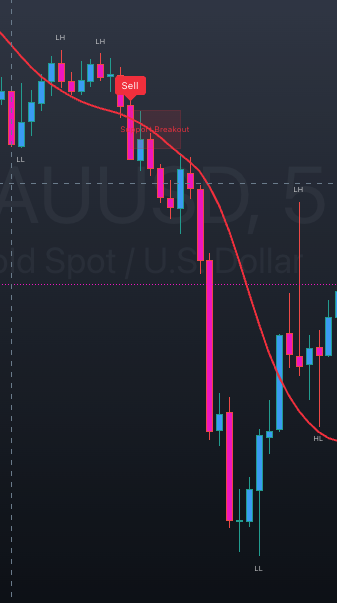
Non-Repainting Signals
Once a candle closes and a signal appears, it's locked. Trust the data for backtesting.
Kill Zone Sessions
London, New York, and Tokyo sessions highlighted. Know when Smart Money is active.
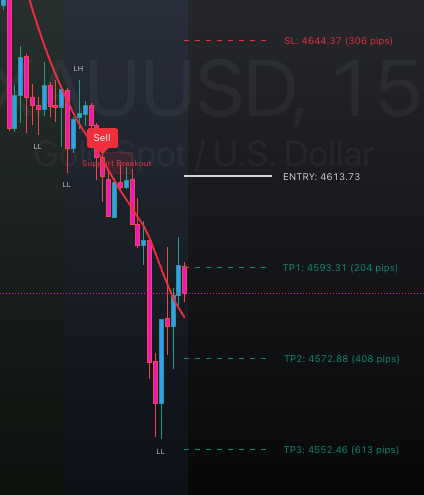
Auto TP/SL Management
3 Take Profit levels and Stop Loss plotted automatically based on ATR volatility.
Built For Serious Traders
Stop guessing. Start trading with structure.
A complete trading system that combines market structure, momentum, and session analysis into one powerful tool.
0
Timeframes Monitored
0
Auto Take Profit Levels
0
Repainting Signals
Ready to trade with confidence?
Join the traders who stopped guessing and started using professional market structure analysis.
View Pricing